Friday, March 25, 2016

How to setup all of your iDrac7s for SNMP alerting

I've toyed with several ideas but finally decided that the best way to accomplish this will be to setup 1 iDrac first, then export the config, and then apply that to all the other iDracs.  This general process should work for iDrac 7 or 8 since they use the same firmware.  This post concentrates on iDrac7.  Please see this additional post on how to do the same thing with iDrac6.  http://bradsjumpbag.blogspot.com/2016/06/how-to-setup-all-of-your-idrac6s-for.html

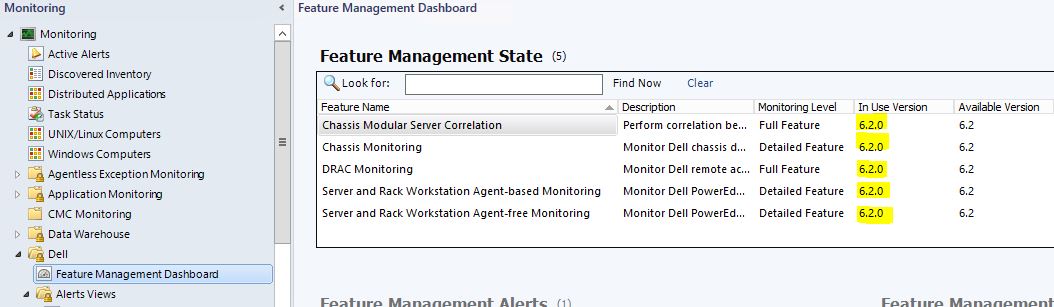
Please remember when setting your SNMP Community String that it is Case Sensitive.  That means that "public" is not the same as "Public".

Let's start with logging into a single iDrac.  Open a browser window and go to the IP of your iDrac7s.  Login with your credentials or the default ones if you haven't changed them.  Which you should change the default credentials or disable them and add new accounts for security reasons.  You should also have all iDracs on a separate management network that is not accessible from the Internet.  If you need to get to them from external, I suggest you setup some machine that you can remote into and then access that management network from there, or setup a highly secure gateway or VPN that will give you access to that management network.


Go to Alerts.  The first thing you want to set is to make sure Alerts are Enabled.  Then click on the Apply button on the far right of that Alerts box.


Next, look toward the bottom of that same page for the Alerts and Remote System Log Configuration section.  This is page 1 of 19 on the iDrac7.  You can either check just the items you want under SNMP Traps, or you can put a check in the top box in the header like highlighted below.  That will check all of them on this page only.  Then click on the right arrow to go to the next page and do the same thing.  Yes, this is will take a minute or two.  Do that on all 19 pages and then click on the Apply button at the end.


Now, click on SNMP and Email Settings tab at the top.  On this page you will need to enable Alert Destination 1 with the check box and enter in the destination server IP address.  Since I am setting this up for OpsMgr, I will put in the IP of my OpsMgr server.  If you are using a different community string you need to add it here as well.  Then click on the Apply button in that same box.  Also, your SNMP Trap format should be in v1 or v2.  I know that both v1 and v2 are supposed to work but I have not tested v3.  If you need to change it, you can also do that here and then click on the Apply in that box.


There is one more place to check your community string.  Go to iDrac\Network on the left side.  Click on the Services tab at the top and scroll down to find SNMP Agent.  Make sure the check box is checked so it is enabled and enter your community string here.  Then click the Apply button at the very bottom of the page.


Now, if you have your destination server (in my case OpsMgr) setup already, you should start receiving traps.  You can test this with the SNMP Test Trap button back on the Alerts\ Trap and Email Settings page.  Click the Test button under Test SNMP Trap in the same row as the destination server you want to send to.


In OpsMgr you will see an informational alert like these.  These alerts could show up in Active Alerts and Server and Rack Workstation Alerts, RemoteAccess Alerts, or PET Traps depending on the iDrac version and firmware version.  They will all be Informational Alerts but should have the word Test in the Name.


Now that we know that 1 iDrac works, we need to copy these settings to all the others.  You will need a machine with access to the management network of all of your iDracs.  That machine will need the Dell DRAC Tools installed. The current latest version, as of 6/24/2016, is 8.3 and here are the link for the 64bit version.
64bit - http://www.dell.com/support/home/us/en/04/Drivers/DriversDetails?driverId=6RWMR

You will also need a text file with all of your iDrac6 IPs, each listed on a separate line.

The next step is to grab a copy of the config of the iDrac that you just set in the above steps.  On your machine with access to your iDrac network, and with the DRAC Tools installed, you are going to run the following command from an Administrative level command prompt.

**NOTE**: These racadm commands below are for iDrac7 running 2.21.21.21.  If you are using older firmware or an earlier iDrac, you might try to use getconfig and setconfig instead of get and set in the below examples.

racadm -r IPofTheIDrac -u Username -p Password get -f LocationForTxtFile

Replace IPofTheIDrac with the IP of the iDrac you configured above.
Replace Username with your iDrac username.
Replace Password with your iDrac password.
Replace LocationForTxtFile with a path to where you want the configuration text file created.  I put the config file in the same location as my iDracs.txt file with all of my iDrac IPs just to keep them together.  In this example I put both in a folder c:\idrac.


Now we need to edit that config.txt file.  Open it with your favorite text editor.
You will see that the first section is [idrac.alert.1] and under that you can see what the alert is and the action has snmp in it.  You want to keep all of the idrac.alert sections.  So scroll on down past those.  An iDrac7 running firmware 2.21.21.21 has about 151 of them.

You can use this file to make changes to all of your iDracs.  As you scroll through you may see other sections you want to make changes to if you didn't do it in the GUI.  But for this post I am only focusing on SMNP settings.  So we are going to remove everything else in the config.txt file.

The other sections we are going to keep are [iDRAC.IPMILan], [iDRAC.SNMP], [iDRAC.SNMP.Alert.1] sections.  There are 8 iDrac.SNMP.Alert.X sections, but I only set the first one so I am removing the others.  You don't have to keep every setting under each section.  Just the settings that we changed in the GUI.

Now save that file, maybe with a different name so that you can keep the original.  I'm going to save mine as idracpush.txt in the same folder.

Here is where we finally push the config to all iDracs.  You will use a PowerShell script.  Right click on the PowerShell icon on your taskbar and select Run ISE as Administrator.  When it opens copy this script into the top window.  You will need to replace Username and Password to your own.

$servers = Get-Content .\idracs.txt
$servers | foreach {
    invoke-expression "racadm.exe -r $_ -u Username -p Password set -f c:\idrac\idracpush.txt"
    }


My green play button is greyed out because it is already running in this picture.  But when you click on the green play button that I highlighted in yellow above, the script will set the config on each iDrac one at a time.  Because of all of the idrac.alert.x sections, this can take quite a while for each iDrac.  And the more iDracs you have in your text file, the longer it will take.  Mine took right at an hour for 15 iDracs.  You can scroll back through the results pane to see if there were any errors.


Wednesday, March 23, 2016

Upgrade to Dell SCOM Management Pack 6.2

Here are the steps I recommend for updating your Operations Manager environment from previous versions of the Dell Management Pack Suite up to version 6.2, which came out in January 2016.

Things to know first:
1. If you have devices discovered as Agent-Free (aka OOB or Out-of-Band), it will be best to grab that list and then recreate that WSMan template after the upgrade.
2. If you have devices discovered as Agent-Free and SNMP, you will need to remove them from SNMP device list before they can be discovered again as Agent-Free devices.  Once they have been rediscovered and inventoried, then you can quickly add them back as SNMP devices.  See my other blog on setting up Agent-Free and SNMP Monitoring:
http://bradsjumpbag.blogspot.com/2015/12/dell-server-management-pack-with-agent.html


First is the smooth upgrade.  After that, is the Manual method for when it doesn't go so smooth.

Download MP Suite v6.2 from here: http://www.dell.com/support/home/us/en/04/Drivers/DriversDetails?driverId=X95GK

Inside OpsMgr, go to Administration\Management Packs.  Here you will need to export any custom MP, that you created, and that is a dependent on one of the Dell MPs.  You can go to the properties of each customer MP or the properties of each Dell MP and look at the Dependencies tab to see which ones you need to export.  In the following picture, I have 3 MPs that I need to export.  I will export all of them to a folder on the desktop for later.


Once those MPs are exported, they need to be deleted.

There are possibly 4 more MPs that you can export and delete.  Usually there are not many overrides in these, so I just delete them.  Hopefully, you have not added any overrides to these because they will be recreated after the upgrade and you will still most likely have to recreate your overrides.  There are 4 you need to delete.  These are the Dell.FeatureManagement.Override, Dell.FeatureManagement.TaskRefresher, and the Dell.SecureReference.Override MPs, and the Microsoft.SystemCenter.SecureReferenceOverride if it is there.

Note: for the sake of writing this and being able to explain the manual method below, I am not going to delete the Microsoft.SystemCenter.SecureReferenceOverride, but you should delete it.


Run the Dell_Server_Management_Pack_Suite_v6.2_A00 zip file and it will extract to C:\Dell Management Packs\Server Management Pack\6.2.  From there, right click on the Dell_Server_Management _Pack_Suite installer and Run As Admin.


You will get a windows notifying you that another version is already installed and ask if you want to upgrade.  Click Yes.  The rest of the installer is a 3 clicks to the Install button and let it finish.  And give it some time; 30 minutes should be enough.

If the upgrade is successful, your Management Packs screen will show all of the Dell MPs being version 6.2.0.x, except for the Dell Base Hardware Library.  Here is what it would look like with a successful upgrade.


If the Dell MPs are not all 6.2.0.x, then the upgrade is not complete.  Most likely because a dependency got stuck.  You need to finish with the manual method of deleting the older MPs and manually importing the rest.

Manual method:

If your upgrade looks more like this:


What we need to do is manually delete each of those that have a version number lower than 6.2, except the Dell Base Hardware Library.  Leave the Dell Base Hardware Library alone.  To delete the others, right click and select Delete.  If you are allowed to delete it, you will see this and you can select Yes.


If there is a dependency, you will see something similar to the following.  Here is where I didn't delete the Microsoft.SystemCenter.SecureReferenceOverride earlier and it caused a problem with the other MPs during the upgrade.


You will need to delete each of these other MPs before you can delete the one where you got this message.  And some of those may have other dependencies.  This may take a couple minutes and be a little trial and error to get rid of all of the lower version Dell MPs, in this example 6.1.1.x.

Now that all of the older version Dell MPs are gone, we need to import the new ones.  To do this, click on the Import Management Packs in the far left Tasks pane, or right click on Management Packs and select the same option.


Click on Add, Add from disk.  Then click on No when asked if you would like to search the online catalog.


Browse to C:\Program Files\Dell Management Packs\Server Mgmt Suite\6.2.  This is where all of the Dell MPs are installed it by default.  Depending on which MPs you had to delete, you may need to select quite a few of these.  I suggest adding most of them at the same time and any dependencies will be worked out; and any that are already installed will show that they are.  Go through the first folder and select all of the .mp files that you need.  If you are using OpsMgr 2012, you will probably not need the ones labeled "OM07".  Click on Add.  Then click through Add, Add from disk again and go to the next folder.  Then again and so on until you have all of them added.  Here are some screen shots.


Once you have added all of them, your Import Management Packs wizard will look like this.  The ones with the green check will be imported and the ones with the blue circle with the white i are telling you that they are already imported and will be skipped.  Click the Install button at the bottom and let it go.


When they are all done and say Imported you can click on Close and then refresh the Management Packs screen.  All of the Dell MPs, except the Dell Base Hardware Library and the custom MPs with version 1.0.0.0, will be updated and have version 6.2.0.x.


At this point, you are updated to the Dell SCOM Management Pack v6.2.  There is one override that needs to be set immediately.  Go to Authoring, Object Discoveries, and in the Look for box, type "dell feature" and click on Find Now.  Right click on Dell Feature Management Host Discovery, select Overrides, Override the Object Discovery, For all objects of class: Management Server.


If this is not already Enabled and has the FMP Host FQDN set, you will need to check these boxes and in the Override Value box you will type in the FQDN of your OpsMgr host.  Then either select a management pack or create a new one to hold this setting.  Then click on OK.


Next is re-importing your MPs that you exported back at the beginning of this process.  Use the same process as what was described above to Import Management Packs and Add from disk.

If your Agent-Free devices do not come back within an hour or so, it will be best to remove the WSMan template and rediscover those devices.  http://bradsjumpbag.blogspot.com/2015/12/dell-server-management-pack-with-agent.html

The last thing you may need to do is to make sure that the features you were using have updated to the latest version.  Go to Monitoring\Dell\Feature Management Dashboard.  Here you will want to look at the In Use Version and make sure they all say 6.2.  If they do not, there are a couple of clicks to get them there.  Mine all went straight to 6.2 so I can't show you one that didn't work.  But I will still give you the steps below to update each one to 6.2.


Starting with Chassis Modular Server Coorelation.  Click on it to highlight it and then click on the Upgrade Chassis Modular Server Correlation Feature task.


Click on the Override button.


Change the AutoResolve Warnings/Errors to True and then click on Override.


Then back on the Run Task window, make sure the AutoResolve value is True and if so click on Run.


When the task is running, do not close the window.  Wait until it finishes and check in the Task Output that it says Success.  The key here is the Success in the Task Output, not under Status at the top.  That Success under Status just means that the task successfully started.


Make sure the AutoResolve Warnings/Errors is set to True for each of the other items below as well.
Next is the Chassis Monitoring.  Highlight it in the Dashboard and then click the Set to Chassis (either Detailed or Scalable) Monitoring Feature task.
Then for DRAC Monitoring, highlight and click on Upgrade DRAC Monitoring Feature.
For both the Agent-Based and Agent-Free Monitoring Features, select them and then the Set to (Agent-based / Agent-free) (Detailed / Scalable) feature task item.

The Dell Feature Management Dashboard, by default is only set to update once per day.  So don't be alarmed if the In Use Version column doesn't update right away.  Give it a little time and it should update as long as the Available Version said 6.2 and you saw a Success in the Task Output of each of the above tasks.

That should be the end.  You have completed the update from previous versions to the Dell SCOM MP v6.2.

Tuesday, March 1, 2016

Dell Command Integration Suite error downloading driver packages

***Edit 5/23/2016: This issue has been resolved.  DCIS 4.2 has been released and has new code that resolves this issue.  http://en.community.dell.com/techcenter/enterprise-client/w/wiki/7533.dell-command-integration-suite-for-system-center***

The Dell Command Integration Suite, specifically test the 4.1 version, currently as of 3/1/2016 has an issue downloading cab files, both driver packages and boot images.

When you go through the wizard to download driver packages or boot images, the catalog file is downloaded correctly.  But a minute or two after the actual download of the cab file starts, you will receive an error that looks like this.


If you open the ConfigManagerExtensions.log at C:\ProgramData\Dell\CommandIntegrationSuite\Logs\ and scroll to the bottom you will see this error.


At this time, it appears that this may be an error with a cloud provider and is being looked into.  To workaround this issue, please download the cab file ahead of time from the following link and then use the second option in the DCIS wizard to point to the downloaded cab file.
http://en.community.dell.com/techcenter/enterprise-client/w/wiki/2065.dell-driver-cab-files-for-enterprise-client-os-deployment

Note: This is not a Dell official blog.